Trying for a baby can be a nerve-racking experience for many women. As each month passes by, the anxiousness grows with the expectation of conception. And then comes that all important time when the pregnancy test comes out ….
Pregnancy tests can now check earlier than ever for early pregnancy. The innovative technology packed into these tiny test strips is designed to detect hCG, the pregnancy hormone that shows up early enough before a missed menstrual cycle.
To get an accurate reading when using pregnancy test strips, it’s critical to carefully follow the usage steps. This means religiously adhering to the package instructions. Since 2008, Zoom Baby has been a top supplier of Pregnancy Test Strips in the UK. Of all the pregnancy tests we sell, the strips have always been most popular – easily outselling pricier rivals from Clearblue or First Response.
Pregnancy test strips differ a bit from the plastic-encased tests found in many drugstores or chemists like Boots or Superdrug. Women trying to conceive often prefer these no-frills tests as they can be bought in bulk at a discount. The strips can be used in two ways – either held in the urine stream or dipped into a urine sample using a cup. The exact time needed varies by brand and collection method, but usually no more than 5-10 seconds. Place the test strip on a clean, dry surface to read the results.
How Do I Perform a Pregnancy Test Using a Test Strip?
Here’s a simple step-by-step guide to effectively conduct an at-home urine test for pregnancy:
1. Check the Expiration Date of your Pregnancy Test Strips
Absolutely make sure to check the strip’s expiration date, normally printed on the test packet. A newer pregnancy kit gives you better odds of an accurate result. Toss out any old stockpiled kits and get fresh ones.
2. Only Use Early Morning Urine
Testing with morning urine ups your chances of an effective reading, as your urine is most concentrated with hCG at this time. You’re also less likely to get a false result. Do the test first thing when you’re ready.
3. Carefully Read the Instructions
It’s important to read the provided instructions before testing, as specifications vary between brands. There may be differences in urine collection method, time the urine stays on the strip, and result symbols.
4. Get familiar with the Diagrams
To truly understand the reading, you’ll need to know the diagrams listed on the pack. If you can’t decipher the result meaning, don’t fret – clarify any doubts by calling the toll-free number on the pack or leaflet. Zoom Baby offers free email and phone support.
5. Be Mentally Prepared
Testing for pregnancy, whether at home or a clinic, usually comes with mixed emotions – especially for first-timers. Nervousness is normal, so prepare yourself mentally. Talking with your partner, friends or family may help ease fears before getting the result. Remember, pregnancy is a natural process no matter what.
6. Carry out the Test Methodically
Though simple, ensure you follow the instructions to the letter. Either urinate directly on the stick, or better yet, collect a urine sample in a plastic cup and test a few drops. When urinating directly, follow the guidelines on how long to hold the stick in your stream.
7. Handle the Test Strip with Care
Pregnancy test strips are very sensitive and easily contaminated. Avoid touching the absorbent end with your fingers. Only handle the strip by the non-absorbent end. Lay the strip flat on a clean paper towel, with the absorbent end slightly hanging over the edge of a counter or table to prevent liquid from running up the strip. These precautions will help ensure your test result is as accurate as possible.
8. Await the Results
After testing, place the stick horizontally on a clean surface to develop. The waiting time ranges from 1-5 minutes and it’s critical to wait the full duration. Some tests can take up to 10 minutes to show a definitive result. Relax and be patient – staring nervously won’t speed it up! Take a short walk, have some tea …
9. Checking the Final Result
Immediately after the waiting period, check the result.
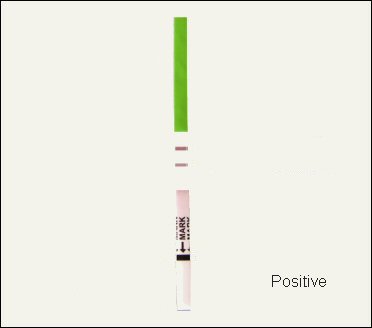
Symbols and diagrams vary by brand, but a line appearing on the test line always signals a positive result.
Even a faint line next to the control line is considered positive – it means the test detected hCG in your urine.

10. What to Do after the Result
Reading the result can be life-changing, so know what to do next:
When the Result Is Positive
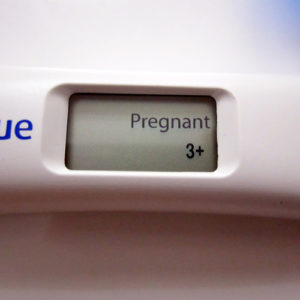
If the urine test is positive, make a doctor’s appointment. They may recommend a blood test to confirm. In most cases, the urine test results are accurate.
When the Result Is Negative
If your period is late but the test is negative, wait and re-test. False negatives can occur if you miscalculated your ovulation date or tested too early. If a second test is also negative, see your doctor to find out why. There may be issues you’re unaware of.
False negatives can happen with ultra-sensitive tests if hCG hasn’t reached 10mIU in your urine.
This doesn’t necessarily mean you aren’t pregnant – just that you tested too soon or had overly diluted urine. In this case, wait 48 hours and re-test with fresh urine from your very first morning bathroom trip.
Photo credit; “Milk” by Anthony Cunningham for Zoom Baby
Zoom Baby is a leading supplier of Pregnancy Tests and Ovulation Test Kits


